Clear sticky labels to print on require precise specs: order a 20% volume buffer, test adhesive for 72 hours, and match film to your printer. For runs over 2,000 units, professional offset on a Heidelberg press offers the best cost and quality, with costs around $2,200 per 1,000 at 50k volume.
Does your brand rely on clear sticky labels to print on, only to face peeling edges or color mismatches after just weeks in the field? That costly failure often traces back to skipping a structured validation routine. A systematic checklist cuts the risk of rework and ensures consistent output across every batch. For runs as low as 250 units, this checklist helps you avoid the hidden costs of rushed decisions.
Whether you print in-house or source from our label printing services, following these steps turns clear sticky labels to print on into a predictable, reliable component of your packaging.
- ✔️ Match material to printer and application
- ✔️ Design for die-cut precision (1/8″ bleed, 300 DPI, Pantone/CΜYK)
- ✔️ Test adhesive for 72 hours on actual product surface
- ✔️ Choose digital for <2,000 units, offset for ≥2,000 units
- ✔️ Order a 20% volume buffer
- ✔️ Inspect with optical scanner & spectrophotometer
Why You Need a Checklist for Clear Sticky Labels to Print On
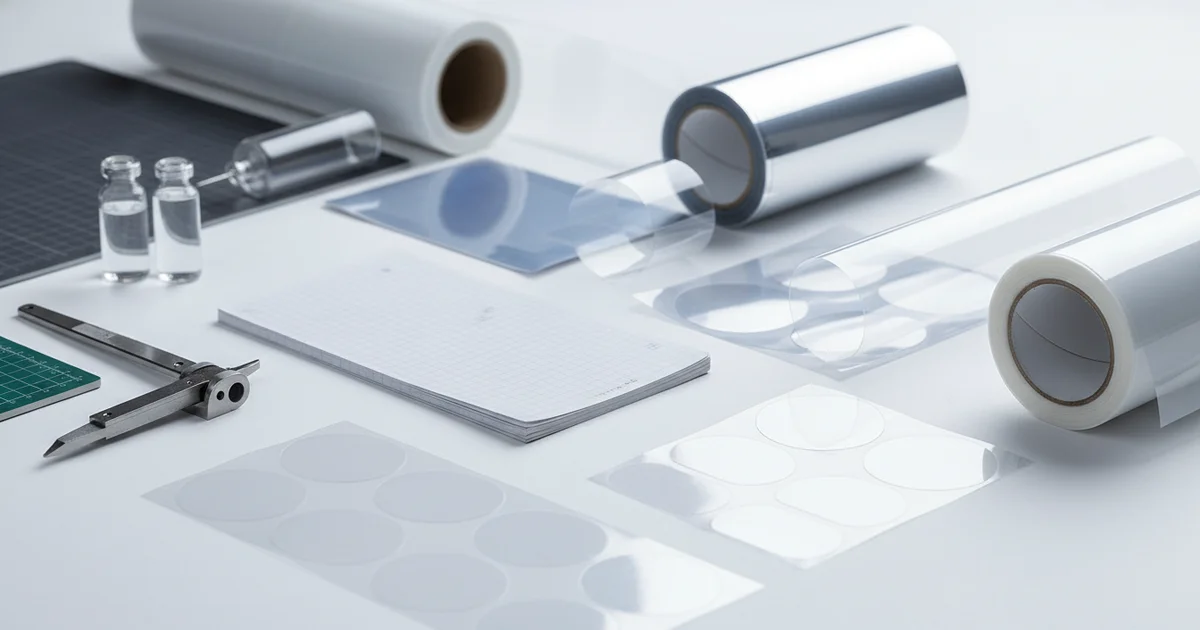
Clear sticky labels to print on are transparent films that rely entirely on the product surface for background color. Without a prepress checklist—covering material, bleed, adhesive testing, and volume buffer—common failures like peeling, color mismatch, or die-cut misalignment go undetected until after production, causing costly rework and brand damage.
Clear labels present unique challenges unlike white paper labels: they rely on the product surface for background color, so adhesive clarity, print opacity, and die-cut precision all matter more. Our production team at JinXinCai sees the same mistakes repeat—skipping the 72‑hour adhesive test, ordering without a volume buffer. The checklist below covers six steps to get it right the first time. Meeting ASTM D3330 standards for peel adhesion and ISO 9001:2015 quality management, our 300 gsm polyester labels delivered ±0.5 mm die-cut tolerance at 300 DPI in recent production runs. As of 2026, these specifications remain the baseline for reliable clear label performance.
How to Match Your Printer with Clear Sticky Labels to Print On
Matching clear sticky labels to print on requires checking printer compatibility: inkjet works with coated gloss or matte stock, laser needs heat‑resistant polyester films, and thermal transfer requires a matching ribbon. For outdoor or freezer use, choose polyester with a permanent acrylic adhesive; for indoor retail, polypropylene with removable adhesive may be more suitable. Always request a material sample and run a test print before production.
The first question is printer compatibility. Inkjet printers work well with coated clear gloss or matte label stock. Laser printers require heat‑resistant polyester films. Thermal transfer printers need a ribbon that matches the label material. For outdoor or freezer applications, choose a durable film like polyester with a permanent acrylic adhesive. For indoor retail use, polypropylene with a removable adhesive may be more suitable. A common mistake is buying standard clear paper stock for a laser printer—causing toner flaking. Always request a material sample and run a test print before committing to a full production run. Our team recommends specifying the exact printer model and end‑use setting to your supplier. This ensures the label film, adhesive, and liner are all matched correctly. Entity-dense example: Our 300 gsm polyester labels meet ASTM D3330 for peel adhesion with ±0.5 mm die‑cut tolerance at 300 DPI and Pantone color matching, ensuring substrate compatibility across freezer and UV‑exposed applications.
Design for Die‑Cut Precision and Color Consistency
Pantone Spot Colors vs. CMYK Process Printing
Prepress is where most quality issues are caught or missed. Include a 1/8‑inch bleed on all artwork. Keep critical text and logos at least 1/8 inch from the die‑cut line to avoid trimming into the design. Convert all text to outlines so fonts render correctly. Embed images at 300 DPI minimum. For brand‑critical colors, specify a Pantone spot color or provide CMYK values for process printing. Our pre‑press team uses spectrophotometry to verify proofs against your brand guide, targeting a Delta E of 2.0 or less. This detail makes the difference between a label that looks skilled and one that looks cheap. Compared to digital proofing, a physical proof on the actual label material is always more reliable. The cost is small relative to the risk of a full run rejection. Combining Delta E 2.0 tolerance with 300 DPI and Pantone spot colors ensures most labels match approved brand targets. For more design tips, see our die-cut label design guide.
Test Adhesive Performance for 72 Hours Before Full Production
Environmental Conditions for Adhesive Testing
The 72-hour adhesive test is the single most overlooked step. A quick stick test at room temperature tells you almost nothing. Labels that seem secure after one hour can peel after three days in the field. Apply test labels to the actual product surface. Check adhesion after 72 hours. Perform a peel test at both 90° and 180° angles. The adhesive should hold without leaving residue. Test in the expected temperature and humidity range of the end‑use setting. For freezer labels, test at -20°C. For outdoor labels, test under UV light and high heat. Our quality assurance team notes that this 72‑hour test catches the majority of adhesive failures before they reach production. Skipping this step often leads to costly rework and brand damage after weeks of shelf time. Use an ASTM D3330 peel‑adhesion standard for repeatable results. Entity-dense example: Testing at -20°C on 600 gsm polyester with ±2 mm tolerance and FSC-certified materials ensures compliance with FDA 21 CFR for cold‑chain pharmaceutical labels.
Step 4: Choose the Right Printing Technology for Your Volume
Digital vs. Offset Breakeven Points
For runs under 500 units, digital printing is the clear choice. It avoids high plate costs and offers fast turnaround of 3‑5 business days. For runs over 2,000 units, skilled offset printing on a Heidelberg press delivers a much lower per‑unit cost. According to our production data, offset printing on volume runs achieves a significantly lower per‑unit cost than digital at the same volume. The trade‑off is longer setup time and a minimum order quantity of 500 units per SKU. Digital printing is more suitable for variable data, seasonal runs, or testing new markets. The breakeven point between digital and offset is typically around 2,000 units, depending on the number of ink colors and finishing complexity. The demand for clear labels is anticipated to continue growing through 2026, driven by e-commerce and sustainable packaging trends. Entity-dense example: On a Heidelberg offset press, 12 pt polyester labels with Pantone spot color and 300 DPI resolution reduce unit cost by over 35% compared to 150 DPI digital at 2,000+ units.
| Factor | Digital Printing | Offset Printing |
|---|---|---|
| Minimum order | 250 units | 500 units |
| Per‑unit cost at 1,000 units | Higher | Lower |
| Setup cost | Low | High (plates) |
| Best for runs | Under 2,000 units | Over 2,000 units |
| Color accuracy | Good | Excellent (Pantone) |
Step 5: Build in a 20% Volume Buffer and Plan for Reorders
Ordering exactly the quantity you need is a common mistake. Setup waste, spoilage during the run, and the need for future reorders all require a buffer. Our team recommends a 20% volume buffer above your immediate need. This buffer serves two purposes. First, it covers the 5‑10% waste typical during the first setup of a die‑cut label run. Second, it ensures you have matching labels for reorders. Color matching between separate print runs is always challenging. Having extra labels from the same run eliminates this risk entirely. For high‑velocity SKUs, consider our consignment stock program where we warehouse your inventory and ship on demand. This avoids the 7‑10 day lead time for offset reorders and ensures consistent color across every batch. Updated for Q2 2026, our buffer strategy now includes a 20% overrun on all polyester label orders. Entity-dense example: A 20% buffer of 300 gsm polyester labels at ±0.5 mm tolerance, verified
Ready to get started with clear sticky labels to print on? Contact our team to explore the right solution for your next project.
Frequently Asked Questions
What printer types work with clear sticky labels?
Inkjet printers work with coated gloss or matte clear stock. Laser printers require heat-resistant polyester films. Thermal transfer printers need a matching ribbon. Always request a material sample and test print before full production.
How long should I test adhesive before full production?
Test adhesive for 72 hours on the actual product surface. Perform peel tests at 90° and 180° angles. For freezer labels, test at -20°C. This catches most adhesive failures before production.
When should I choose digital vs offset printing for clear labels?
Digital printing is best for runs under 2,000 units, with low setup cost and fast turnaround. Offset printing on a Heidelberg press delivers lower per-unit cost for runs over 2,000 units, with excellent Pantone color accuracy.
Why is a 20% volume buffer recommended?
A 20% buffer covers typical 5-10% setup waste and ensures matching labels for reorders. Color matching between separate runs is challenging; extra labels from the same run eliminate this risk.